Solar Mobiles
Solar mobiles invite learners to experiment with how light is transformed into energy. It makes for a good introductory Playing with the Sun activity, and doesn't require building elements from the construction kit. Parts and materials are linked below and fairly easy to find.

Siting the Workshop Space
Ideally the workshop is setup to start indoors with lamps (because it might rain), with easy access to an outdoor area with an unobstructed view to the sun in case the weather is good. This way the learners get to experiment with their mobiles both indoors, with artificial light, and outdoors, with the sun.
If you are in the Northern hemisphere, you want access to the south facing sky, where the sun is likely to be. If you are in the Southern hemisphere, you need access to the northern sky. While these mobiles will still work on a lightly overcast day, they need a clear line of sight to the sun. A clothesline or long piece of paracord makes a nice place for your learners to hang up their mobiles while they experiment with them.
Materials and Building Instructions
You can have between 2 and 4 people experimenting with each mobile. Here's what you need to make one:
| Item | Description |
|---|---|
| Small drone motor similar to this 716 coreless motor | Any small low current motor in the range of 3-6 volts will do. |
| A propeller that fits the motor | For the 716 coreless you need one with a .8mm hole that you press fit onto the motor shaft. I find 30mm props give the quickest response to changes in power. |
| 5V solar panel approx. 1 watt | I like this one from Voltaic but anything in that 5V 1 watt range or even less should work. You can experiment with larger panels because the weight is carried by the string. |
| 3mm aluminum armature wire, sometimes called florist's wire | This is still enough to hold position, but can easily be bent without breaking. Here's an example. |
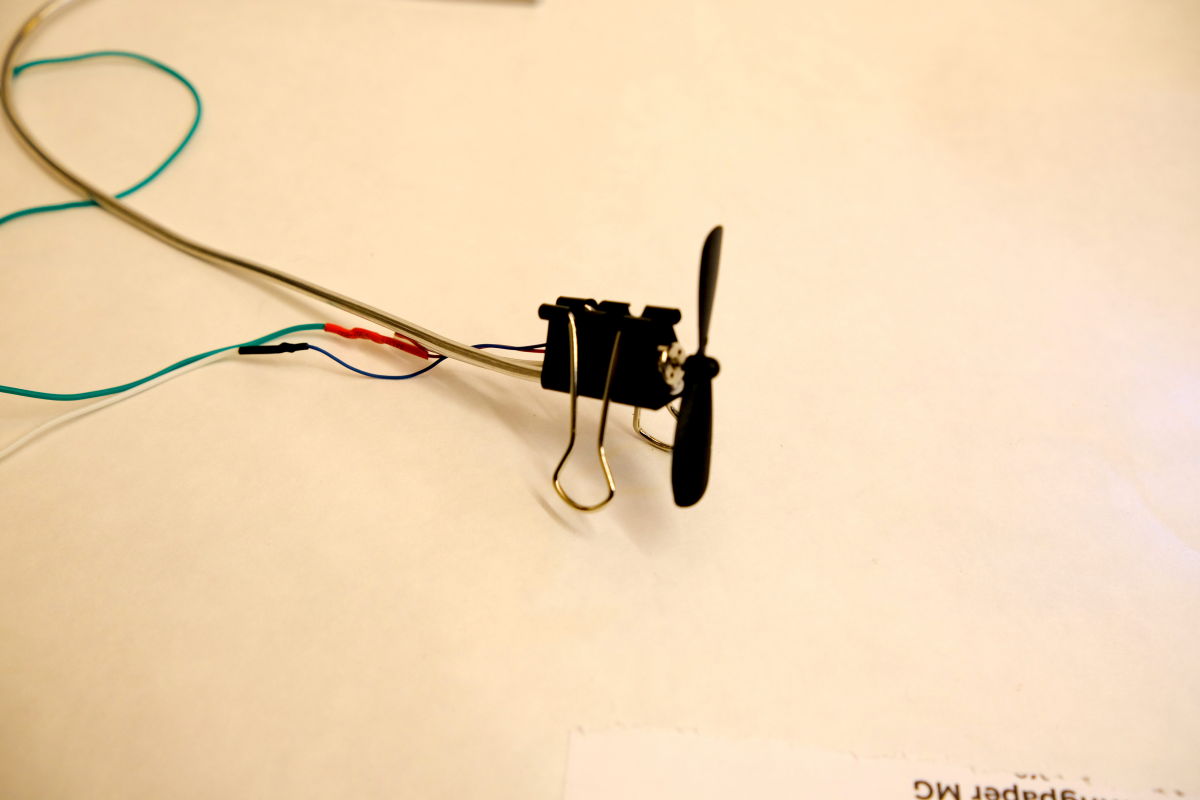
| 25mm binder clips | To hold the motor in place on the armature wire. |
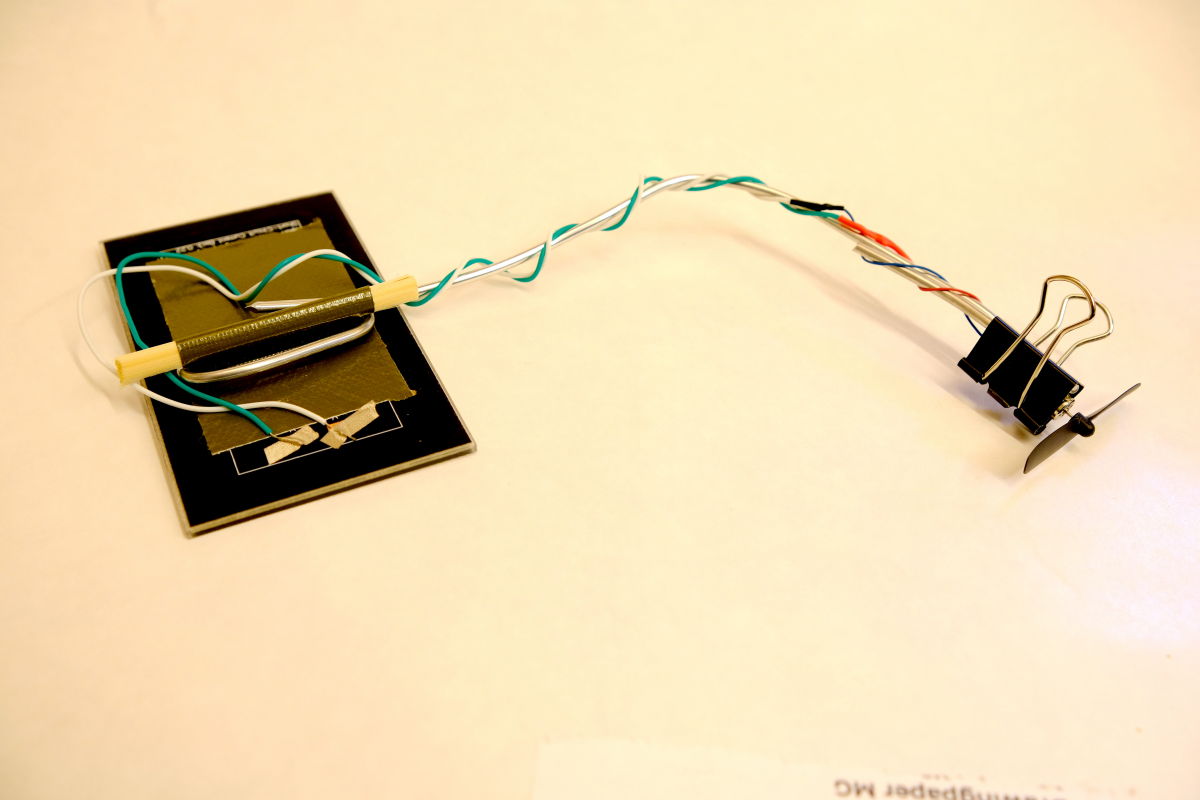
| Thin wire to lengthen the motor leads | If you like, you can solder the motor leads directly to the panel - that's the strongest connection. But you may want to consider having your learners build their own mobile from scratch. If that's the case, and you don't want them to solder, you can use Chibitronics conductive fabric tape. But keep in mind it may need to be pressed down into place every now and then in case it gets loose and looses connection. |
| Fishing Swivel | To allow the mobile to keep spinning in the same direction without twisting the string. You can omit this if you don't mind the mobiles going back and forth once the string torsion gets high enough. |
| Clothespins and twine | To hang the mobiles. |
| Chopsticks and duct tape | To make a toggle on the back of the solar panel to wrap the armature wire around. |
Indoor workshop Setup
About 6 people at a time can work around the same desk lamp (in two groups, with two mobiles.)
| Item | Description |
|---|---|
| Ikea Tertial Desklamp (or similar) | These are cheap and can be positioned in lots of different ways. But they may get hot since we have to use halogen or tungsten bulbs. |
| PAR 75 Watt Halogen light bulbs | PAR means that the lightbulb has a built in reflector so that most of the light gets sent downwards. It needs to be halogen or classic tungsten - an "old school" lightbulb - because LED lights don't emit light in the spectrum that solar panels like. Be sure to get the correct voltage for your country's mains power (120V for US / 220V for Europe) |
| Chopstick | For hanging the mobile's clothespin. |
| 25mm Binder clips, x 2 | To hold the chopstick onto the bell of the lamp. |
| Thick rubber bands | To wrap around the lamp's spring posts to strengthen their springs so that they can hold the extra weight of the mobile and the heavy bulb. |
Solar Mobile Build Instructions
You can build the mobiles for your learners in advance. Or you can give them the elements and have them assemble them themselves as part of the workshop, depending on your pedagogical goals.
-
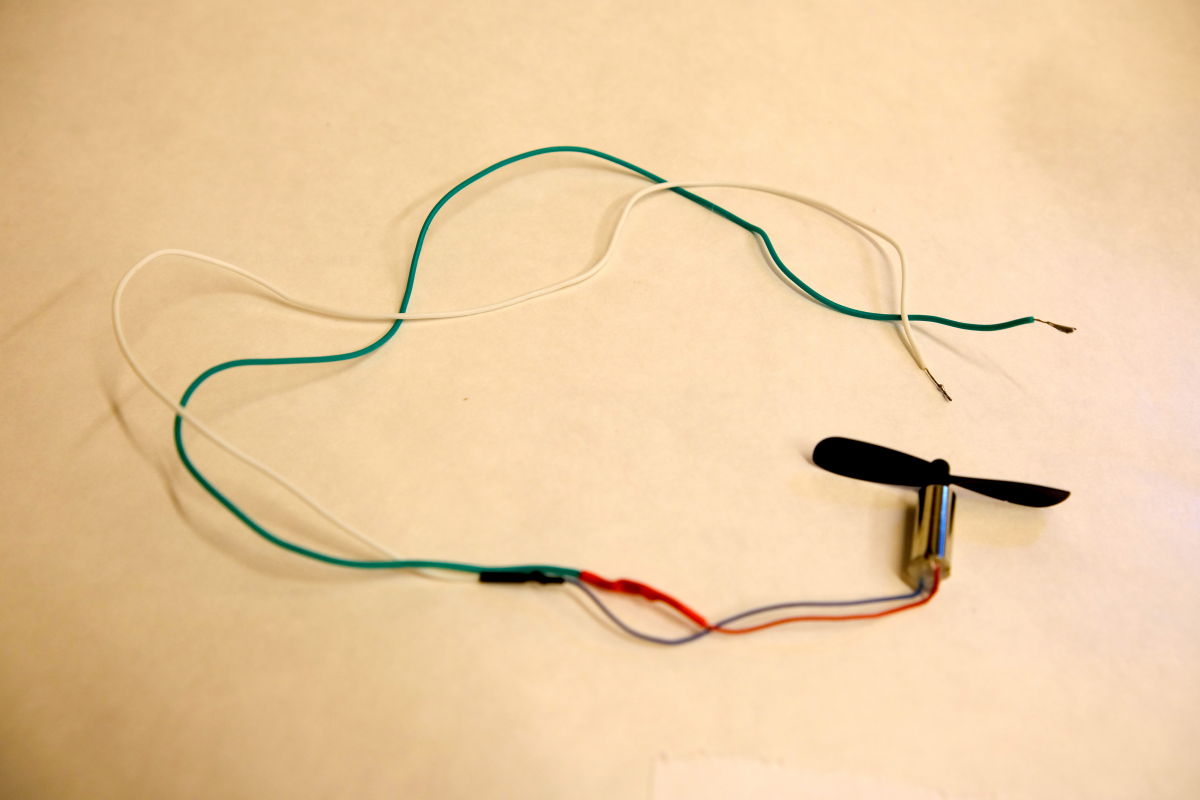
Lengthen the leads of the motor by adding more wire (soldering is nice here, but you can use very small wire connectors if you prefer). Make it long enough to reach the solder pads of the solar panel while loosely wrapped around the armature wire.
-
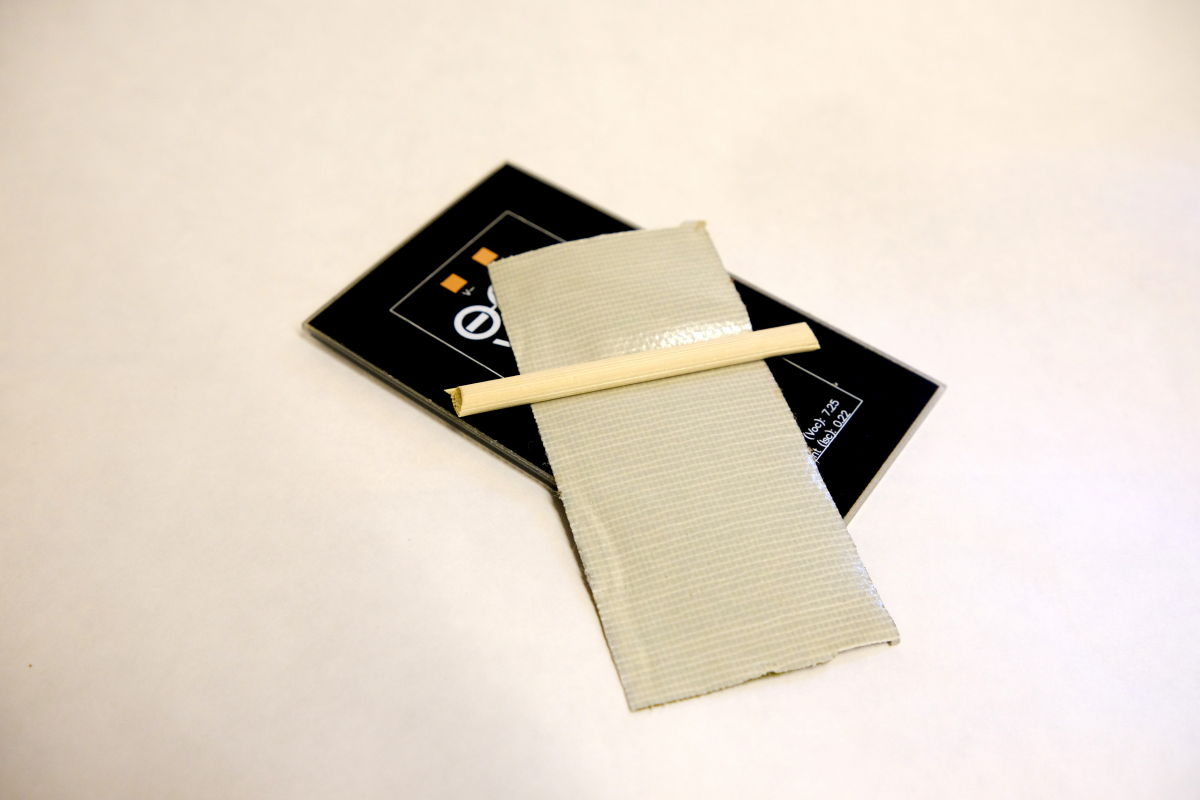
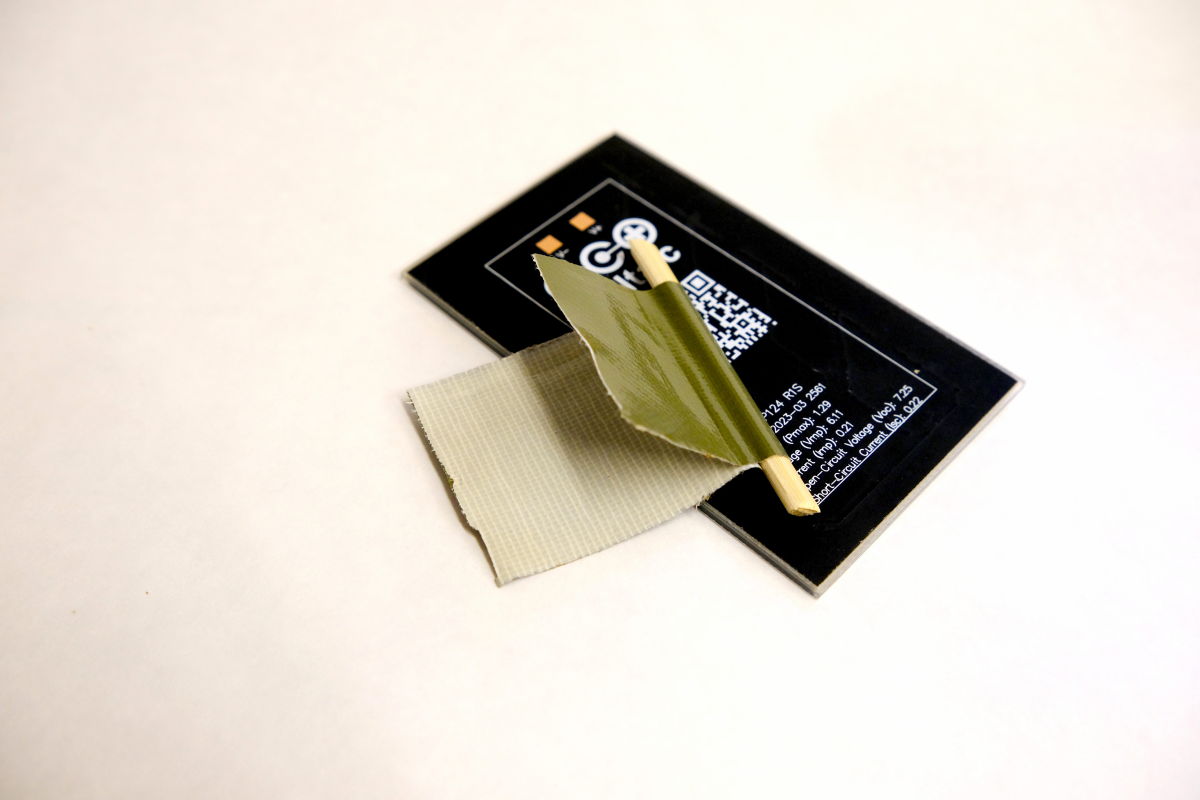
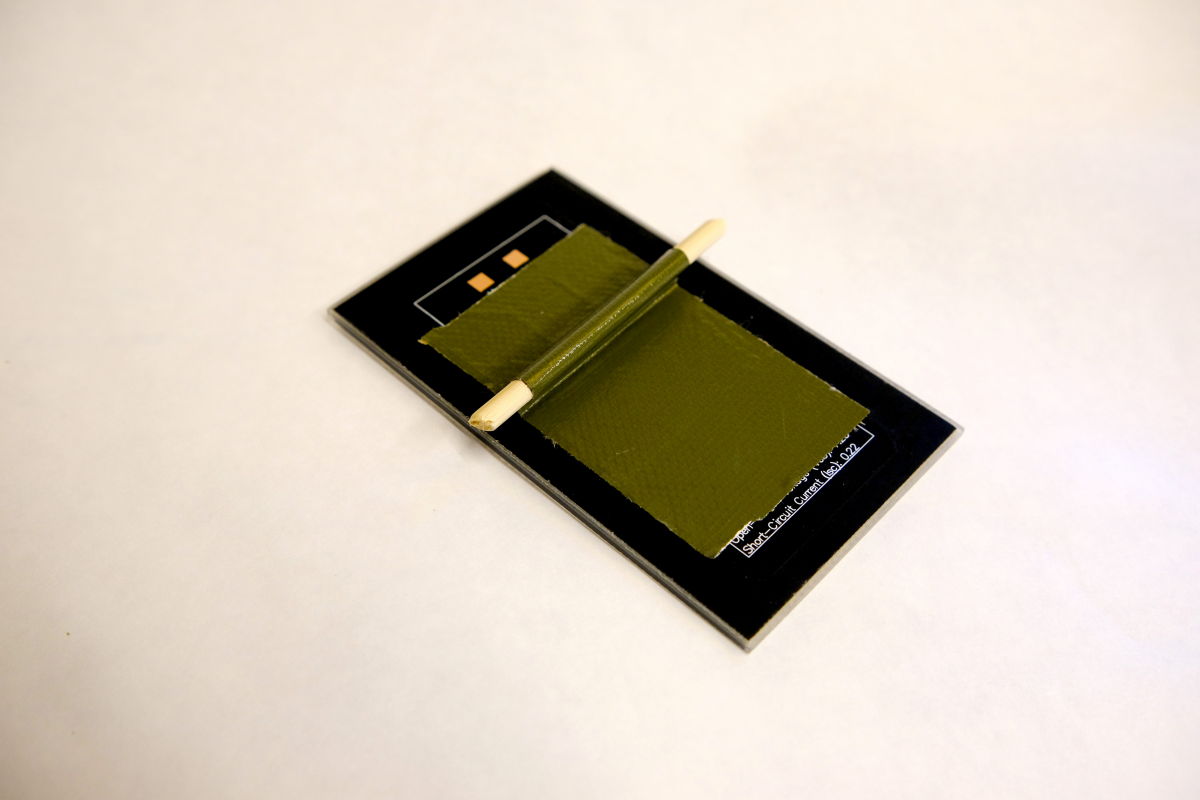
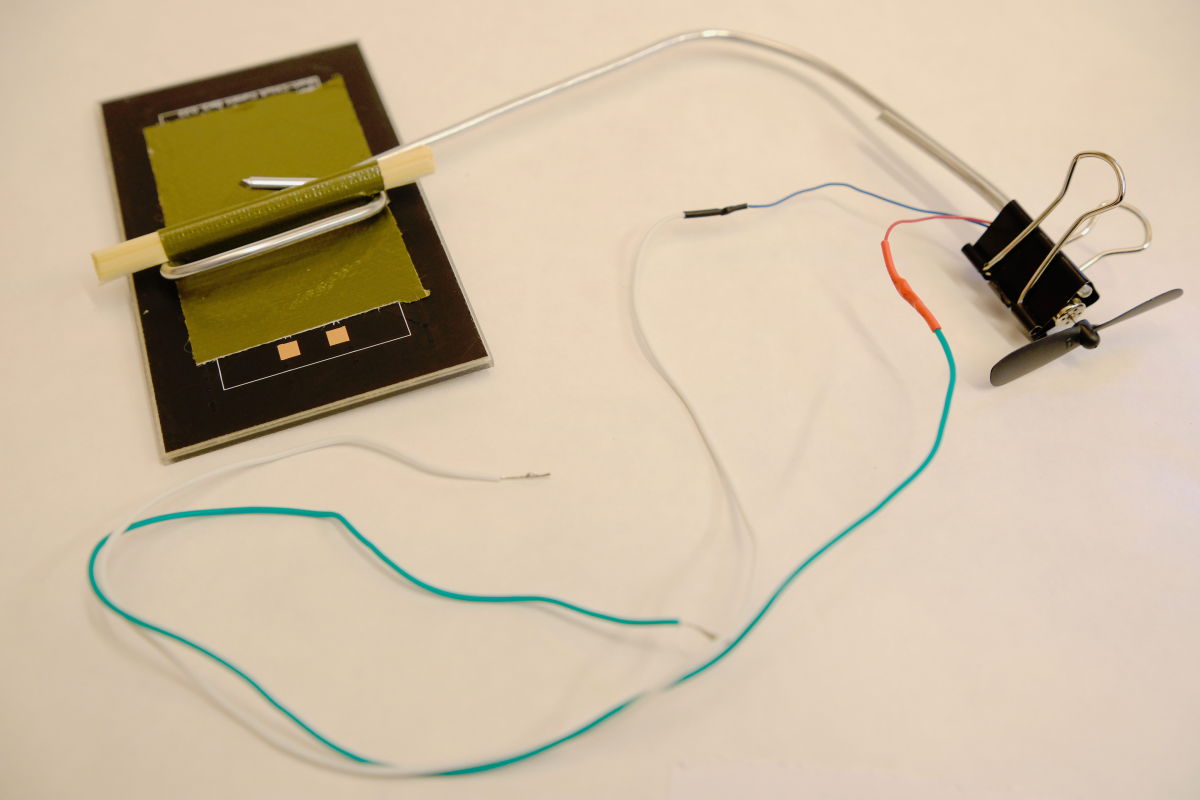
Take a piece of duct tape about 12 cm long. Break or cut a chopstick to 1/3 its length. Lay the stick about 1/3 of the way from the top of the duct tape,and work the tape around it until a few mm of it contacts itself. Then fix it to the back of the solar panel. The idea is that the taped chopstick creates a "toggle" you can wrap the armature wire onto.
-
Cut a length of armature wire about 40cm long and fold about 6 cm of one end over onto itself, creating a tight U small enough to for the binder clip to fit over. You may need to use pliers. Place the motor with the prop sticking out just past the end of the U and place the binder clip over it, to hold it in place.
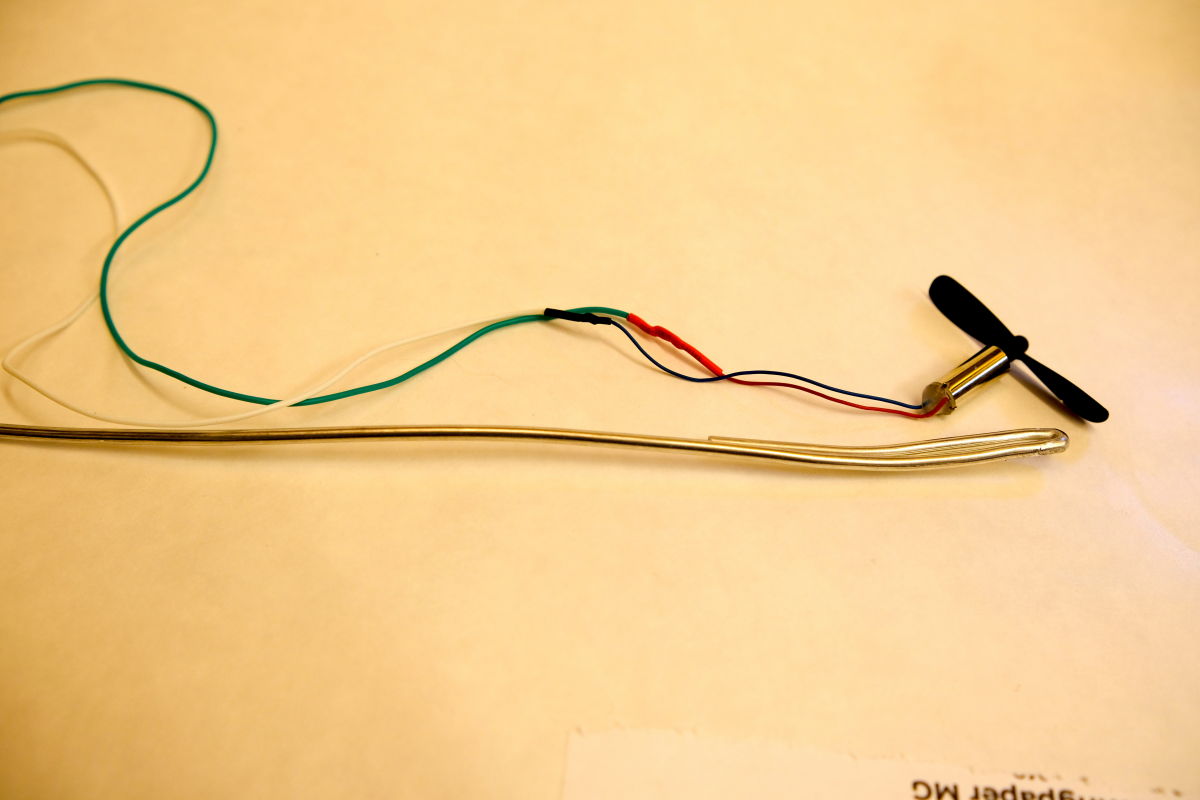
-
Wrap the armature wire around the toggle on the back of the panel so it will hold on. Then wrap the motor leads around the armature wire as it gets closer to the pads on the back of the solar panel. Either solder it on to the pads, or use conductive tape to hold the wire to the solder pads. If you use conductive tape, keep in mind that it can come loose and stop working, so pressing it down again is a good first step when troubleshooting.
-
Now bend the wire close to the solar panel to make an inverted "U" shaped balance point, where you can tie your short length of string (about 10cm). Attach the fishing swivel, and then tie another length of string to the top of the swivel and attach it to your clothespin.

-
Hold it up to the sun and watch it spin!

Experiments Designer Educators Can Take Further
Here are few design directions that could be explored further as means of enabling fruitful explorations by learners. If you find something interesting, even if it's a half baked idea, please post a video and send the link so we can add it to the list.
- Colored cellophane projections What sort of patterns can we make with the light shining from the lamp down onto a piece of paper? How does the light change? What's different when you work inside with a lamp vs. outside with the sun?
-
Burning incense smoke What does the smoke show us about how the air moves around the mobile, the propeller, the room?
-
LED on bottom, open shutter simulation trace Notice how the trace moves as the mobile moves. Is it consistent, or does it change? Why? What different patterns can you make? This uses a simple Processing sketch that simulates a "long exposure" camera.
Sample Workshop Schedule
Here's an example schedule and set of prompts to use as a starting point to adapt for your own workshop. Tinkering workshops generally follow a structure of introducing the materials and prompts, allowing the learners to explore while lightly facilitating (see the facilitation field guide), some form of show and tell so that everyone can see the ideas that emerged, ending up with group reflection. Here's one way such a structure might play out in a solar mobiles workshop.
90 minutes total, groups of 3 to a mobile, two groups to a lamp.
Prepare by laying out the materials for each group to build their mobile: armature wire, prop and motor (with pre-soldered long leads), 3 small pieces of conductive fabric tape, solar panel with mount toggle already taped in place on the back. Have a materials table with lots of different translucent or patterned materials to experiment with, and plenty of small wooden clothesline clips to clip them on. You may want to provide extra armature wire as well.
00-20 Intro / welcome / build out / prompt: Demo 3 Sample projects: Fast spinning Slow / back and forth Aesthetic experimentation (with celophane)
-
Tinkering: you are free to experiment, there are no grades, or wrong or right answers.
-
Come to this experience as a learner. There will be time to reflect as an educator later on.
-
We will have 50 minutes to play and experiment in groups of 3. Start at the lamps, but you will be welcome to take your mobile outside.
-
Intro each of the parts.
-
Step by Step build instructions:
- begin by holding the wires to the solar panel pads while you place the panel under the light
- If you switch the wires, the prop spins in a different direction
- Now take your armature wire, wrap it around the foot of solar panel like this.
- Clip the motor onto the armature wire like this.
- Wrap the wires around the armature wire to get them to the pads on the solar panel.
- Now use conductive tape to attach wires to the pads.
- Now tie your string and test it!
Things for facilitators to note:
-
You can bend the armature wire any way you want to change the balance and the direction of thrust from the propeller.
-
A tip to make it easier to balance the motor and panel: bend an inverted "U"crook just outboard of the solar panel and tie the string there for easier balance.
-
If the propeller doesn’t move while the panel is under the light, try pressing down the conductive tape that holds the motor wires to the pads on the back of the solar panel.
Prompt: (stated at begin of open-ended tinkering time) "Explore the different relationships possible between your mobile and the light."
20-60 Building and Experimenting
If starting indoors, look for a group that has found an interesting movement, and invite them to try their mobile outside and observe how it changes. You can do this at opportune moments for each group.
Then you can ask: “How does it behave differently outside?”
60-75 Show and tell / reflection per group / gallery walk
Gather everyone together to go around the room, asking each builder to demonstrate their mobile, and how it came to be.
75-90 General Reflection on Experience as a Learner
Some questions we often ask are: "What were you curious about during the activity?" “what was surprising to you about the activity.” "What was difficult about this experience?" "If you had more time to explore and build, what would you try next?"